Pending full post write up – for now, sighted peeps can take a gander at my early 360 captures. Non visual pals, I describe all content on instagram. This is work in progress and descriptions are coming with my next embed!
Notes in progress:
Matterport Tools:
I have often gone into the space simply by clicking on the scan to view the space as anyone would, but when I would add notes and comments, they wouldn’t appear in a view when I wasn’t logged in. Imagine my surprise (and joy) in finding that instead, one must click the Edit button at the top of the page within the dashboard which provides a whole suite of editing features.
The first option (below search) was Starting Location. I am kicking myself for not having found this tool earlier in my use because I have certainly done gallery scans where suddenly, my starting location is in the washroom. Now able to define the starting location, I marked the area outside the side door, which was funny because I wasn’t using this door for navigation and keep it locked while I am there. However, since the back patio wasn’t allowing for a clear scan due to the large open area into the plaza, this was the next logical choice. A button at the bottom of the page said Set Start Location, so once I navigated to that point in the scan, I clicked it and boom, defined. Phew. Good start.
I clicked on Labels next, but was immediately served a link to visit the new Property Layout tool which was touted as “an improved way to add labels, measurments, and information about your rooms and space”. Fine. I clicked on it and was moved down to the second last option in the Edit menu.
I am able to see the trailer again in the bird’s eyeview, but this time, it identifies the interior space of the trailer with a white outline, defined the area (207 ft2 or 28′ x 7′ 5″) and shows where I had redefined my starting location with a red bullseye. A submenu on the bottom of the page shows me a series of icons (wall, invisible wall, door, and opening) and so I am able to define the side door that hadn’t been automatically identified as such by the scan. I assume that is because the door of the trailer has a black handle on a black background (not accessible) and it couldn’t detect it as an opening, even though I passed through it to make a final scan outside that door. It’s also the starting point of my scan. I activate the door tool, and click the section above the stairs. Two red points on both sides of the door which I thought would allow me to adjust the width but the only option was to switch it’s type from door to opening. Bummer. It also doesn’t allow me to define the two patio doors as a double so the full span was listed as a single door, but that shouldn’t affect any of the tools I have had access to so far.
The defined space was called “Other” so I clicked on the vertical elipses,
Two thirds of the way down the page, I was delighted to find the Plugins section. This is what I had been longing for, and while I had use the “notes” functionality within the viewer in the past, that simply was logged to a session and not embedded into the scan for all users to see. Now I could add links, a minimap, a business card, and a compass.
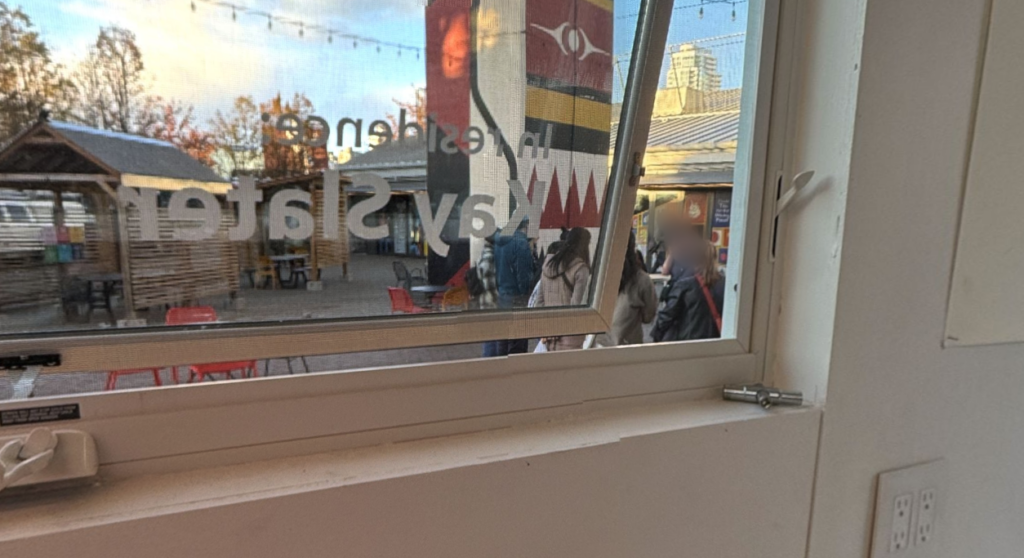
- Link: This allowed me to add text, a link, and a photo. I uploaded the high contrast version of the sandwich board text, as well as the URL to my FLEET residency info page, and clicked save. Nothing happened and it went back to the mini menu. Clicking back into quick link I found there was a toggle at the top of the edit section, and turning that on, the image appeared in the lower right corner. I’m curious what that is going to look like in the live view.
- The Minimap was also exciting because I was hopeful that I could mark different sections or exhibits in an exhibition to match the navigation, but it was a challenge to figure out. Click on the map simply moved me to different scanned locations. How was I to add information?
I am delighted to find a blur button. In the past, I have simply messed up my scan by putting a finger over the lense as I capture certain areas to obscure it from capturing faces, which makes for a truely messed up dollhouse as it tries to integrate a flat view of my fingers into the 3D space. Since I am in public, I wondered what I would do if I ended up capturing a passing tourist or worker, and so I spent a lot of time waiting for people to pass by. An easy thing to do at midafternoon on a weekday, but forget about doing that on a weekend on the island. It allowed me to choose a brush size and once blurred, it appeared in a side menu that listed where I had made the modification and gave me the chance to toggle it off or delete it. I would have appreciated the ability to rename it, but I am pretty happy to find this tool.
When I had applied the blurs and moved to another section in the editing tool, a warning appeared asking if I wanted to apply the blurs after which they would no longer be editable. Ah – this is why I couldn’t rename them – they would become a part of the scan. Happy, I clicked the right Yes, apply button and moved on.
The next option is the trim button and this one still puzzles me a bit. I have used it when creating dollhouse captures of the gallery before, when the exterior is not important, so anything it gathers outside can be trimmed without losing any visuals in the eventual walkthrough, but I can’t trim anything away in this scan because I had tried to capture the plaza. I wonder, for the next scan, if I can define the plaza’s borders because of the wooden edge pieces and trim away the road and buildings beyond. Making a note for my next scan.
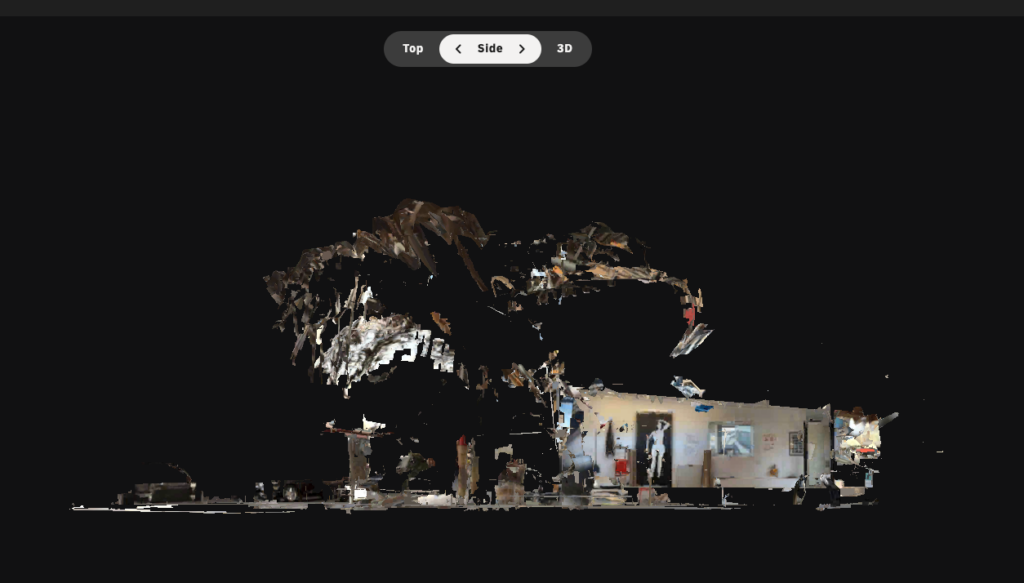
What I do observe within this editing tool is that I can view my dollhouse from the side, top, or as a 3D session. When I click side, I get to observe where it attempted to scan the underside of the bridge and the scattered pieces gives the impression of a fireworks show.
Clicking the Property Layout Button (second from the bottom as a new icon appeared during my play session),
Check out – Merge spaces – https://matterport.com/features/merge
MPSkin, cool but too much
In August, I attended a webinar for the partner plugin MPSkin which is, as the title implies, a skinning program that added a whole bunch of functionality, and from what I could see, it really leveled up the possibilities for a large site museum or cultural space by allowing for avatar integration, multi-language functionality, and interactive menus. However, I had to attend the webinar on my phone, and Zoom forces chat comments over top of the captions, so I didn’t catch much of what the speakers said (but I did see a lot of self-involved people talk about their projects…and learned that within the active session you cannot turn off chat notifications). I decided I had seen enough after about an hour and went looking for it myself. There is a 14-day free trial, but the cost is way too prohibitive both for my single space at fleet (it’s a monthly subscription – which makes sense, just not for me) and way too much for the single room galleries at which I work. So rather than waste my time seeing everything that is available, I’ll stick to the default tools and Matterport Labs.
Matterport Labs is their collection of tools available to MP subscribers and since there are not extra costs involved, I went there next.
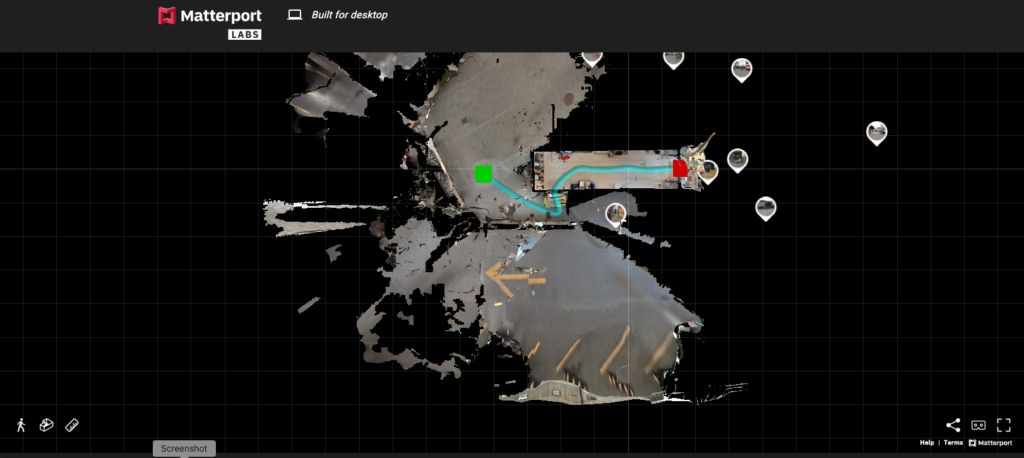
Route finder
The entry on the website called this tool ‘a route finder that supports waypoints and obstructions” (built for desktop).’ “Excellent – isn’t this exactly what I need?” I thought.
It was a little underwelming. This may be due to the fact that my scan has very few points and couldn’t do a full scan outside the building, but it mostly just showed me where I had scanned from start to finish as a line. There was no modification (that I could tell) and I couldn’t define a path. With this tool in mind, I am going to do another scan that has far more datapoints and do more of the static 360 captures away from the trailer. There exists a tool to turn the 360 static captures into scans that you can later line up, but I struggled to get them to line up in my strange spacial location under the bridge. Since I’m not dealing with a rectangular parcel of land in a suburban neighbourhood, it requires more work to get the scan to line up cleanly.
Fly Through Generator
This one didn’t even work with my scan. If it was supposed to do anything other than show me points on the overhead map where I had scanned, I can’t figure out what it is. There is no UI (user interface) that initiates the fly through and clicking on the points just centres the page. So far Matterport Labs offerings were not too compelling, but I still want to allow that it is because my scan is so basic.
There also exists a Pano Painter (a colouring tool) and a Spacial Planner for furniture, but neither are really a part of my goals for this project. If I get wifi at the studio later, then I might play around, but while I borrow time at home to update my archives it takes away time for me to be in the studio working and gathering data.